The MacBook Air is an iconic piece of technology renowned for its design, power, and user-friendly interface. One function often used by MacBook Air users is screen capturing or “snipping.” Whether for work, education, or personal use, swiftly capturing and annotating screen sections is invaluable. While macOS provides in-built screenshot capabilities, third-parties snipping tool for MacBook Air can often offer enhanced functionality and convenience.

Understanding Snipping Tools
Snipping tools allow users to capture (“snip”) a portion of their screen. These tools often provide additional features like the ability to annotate screenshots with text, shapes, or highlights.
Some tools even offer advanced functions like timed screenshots or screen recording. These applications can be a boon for anyone needing to share visual information quickly and clearly, from software developers to teachers.
The Built-in Mac Snipping Tool: Screenshot
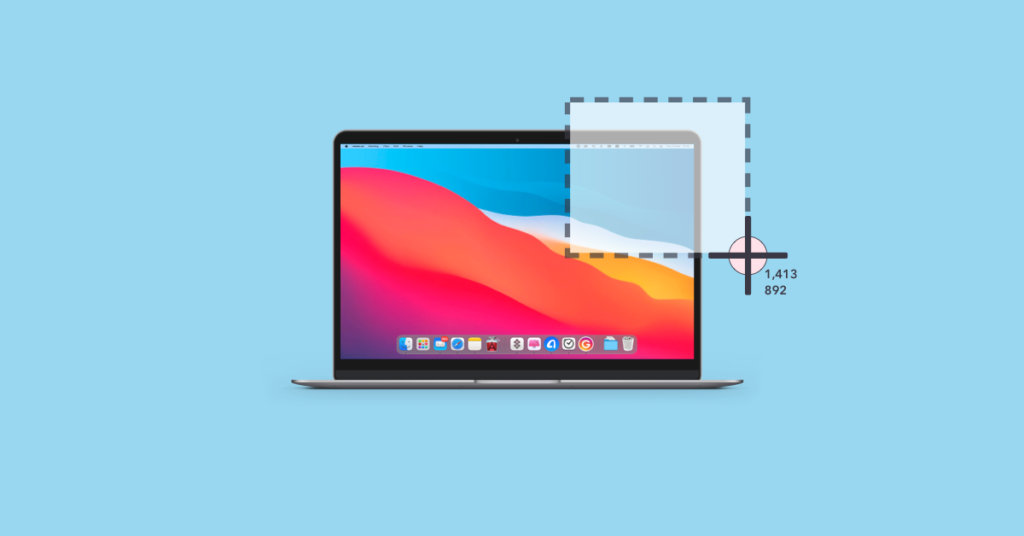
MacOS has a pre-installed snipping tool called “Screenshot,” accessible through the shortcut Shift+Command+5. This tool lets users capture the entire screen, a window, or a selected portion.
It also offers options to save the screenshot to a specific location, set a timer, and choose whether or not to include the cursor in the screenshot. While functional and handy, the built-in tool lacks more advanced features than some third-party applications.
Top Snipping Tools for MacBook Air
Several third-party snipping tools can augment the screen capture experience on MacBook Air. Here are some excellent options:
1. Snagit: Snagit is a powerful snipping tool with features including image editing, video capturing, and advanced screen recording. It’s ideal for professionals requiring comprehensive snipping functions.
2. Lightshot: Lightshot is a user-friendly and lightweight tool that enables users to capture a screenshot and then draw or write on it before saving it. It’s simple, quick, and perfect for users seeking a straightforward solution.
3. Skitch: Owned by Evernote, Skitch is a robust tool for capturing and annotating screenshots. Its user-friendly interface makes it ideal for quick edits and sharing.
Also Read: PUBG Error Could Not Connect Issue: Troubleshooting And Solutions
Choosing the Right Snipping Tool
When selecting a snipping tool, consider your needs. The built-in Screenshot app may suffice if your requirement is limited to simple screenshots. A tool like Snagit would be better for advanced features like video recording or extensive editing. Lightshot or Skitch could be perfect for users needing quick, easy annotation capabilities.
Utilizing Snipping Tools Effectively
To fully harness the potential of these tools, think about your requirements before capturing them. Are you showing a software bug? Use the annotation tools to point out the issue directly. Are you demonstrating a process? Consider a video capture instead of a static image.
Remember to manage your captures effectively, too. Ensure your screenshots are properly named and stored in an easily accessible location. A simple habit will make referencing your captures in the future much easier.
Respecting Privacy with Snipping Tools
While snipping tools are incredibly handy, they can also infringe on privacy if misused. Always ensure you have permission to capture and share content if it involves others’ work or private information.
Conclusion
Snipping tools are potent utilities that can significantly enhance how we share visual information on our MacBook Air. Whether using the pre-installed snipping tool for Macbook air or opting for a third-party application like Snagit, Lightshot, or Skitch, these tools can boost productivity and clarity in communication. As with any tool, the key lies in understanding its features, choosing the one that fits your needs, and using it responsibly.